Heading

Welcome to my Gluttonous Gluten Free Life!
Showing posts with label Chocolate. Show all posts

Monday, April 9, 2012

Chocolate Pomegranate Petit Four

I've always been a big fan of "bite sized" desserts.

Well before specialty cupcake shops started popping up in every neighborhood displaying their "mini" cupcakes ... I can proudly say that I had been making them before their rise in popularity!

With that said I have decided to "retire" from baking mini cupcakes and master other bite sized treats. This weekend I decided to take on Petit Fours (French word for "small oven")! They are not as complex as their French name sounds, but come prepared with patience and a few hours to spend on these tasty little treats!

Trust me when I tell you that MANY recipes were considered before I found this particular recipe. I would like to thank A Spicy Perspective as this was their recipe! Well minus the cake part... I cheated again and used a gluten free chocolate cake mix. The cake mix was helpful for me as I needed a GF option and I was trying to save time. {I was baking for these for a baby shower and knew that I wouldn't have time to make a gluten free cake from scratch - plus this particular box mix is super tasty!}

First things first - bake the cake! Since I used a cake mix, it was easy to quickly mix the ingredients and throw it in the oven for 22 minutes {Disregard the time suggestion on the box - if you use a 13 by 9 rectangular baking pan, 22 minutes is more than enough} Also make sure to line the cake pan with parchment paper for easy removal :)

As the cake is baking, prepare the POMEGRANATE WHIPPED CREAM. Mix together GF flour and pomegranate juice in a medium saucepan on medium heat until a paste is formed. Once the paste is formed, place the saucepan in the fridge to cool. The paste should look similar to the picture below. 

{ Pomegranate Juice and Flour Paste}

After the paste has cooled in the fridge for about 10 minutes, scrape into mixing bowl with the creamed butter and sugar and beat until well mixed.

{Pomegranate Whipped Cream}

Remove cake batter from freezer and spread the Pomegranate Whipped Cream evenly over the cake, return back to freezer.


{Adding the Pomegranate Whip to the cake}

As the first two layers are setting up in the freezer, get the Chocolate Whipped Cream together. Mix milk, cocoa, and gf flour together in a saucepan on medium heat until the paste is formed. Place chocolate paste into fridge to cool for 10 minutes. Then scrape it into 2nd batch of butter cream mixture (please note that the measurements between the pomegranate butter cream is different than the chocolate butter cream). Beat until the chocolate paste is blended.

{Whipped Chocolate Cream}

 Spread over Pomegranate layer and place back into the freezer until all three layers are COMPLETELY frozen.


 {All three layers will take about 2 hours to completely freeze}

Once all three layers are frozen. Trim the outer edges and cut into 1 inch squares. Please back into freezer


{My perfect little squares.}

Prepare Pomegranate Fondant. If you have not made Poured Fondant before, please watch this VIDEO. "A Spicy Perspective" suggested it on their webpage and it was very helpful for me!

{Pomegranate Fondant}

Now it's time to "Dip and Decorate"!!

I used a small marshmallow like skewer to dip the Petit Four pieces in the Fondant. Then I placed it on a wired cooling rack to set. After all of the Petit Fours were "dipped and decorated" I transferred them onto paper cupcake holders and then to a serving platter. In my case I placed it back into the freezer until it was time to head out to the baby shower that I made them for. 


{All ready to take to the baby shower!}

{Yay, all my hard work and patience paid off, this looks great!}

CHOCOLATE POMEGRANATE PETIT FOUR

Ingredients:

- 1 Gluten Free Chocolate Cake Mix 

For the Pomegranate Whipped Cream:
- 2 sticks of unsalted butter, soften
- 1 cup of sugar
- 1 cup of pomegranate juice
- 1/4 cup of gf flour (I used GF All Purpose)

For the Chocolate Whipped Cream:
- 1 stick of unsalted butter, soften
-1/2 cup of sugar
-1/2 cup of milk
- 2 tablespoons of gf flour 
-1 tablespoon of cocoa powder
- teaspoon of vanilla extract
- 1/4 cup of dark chocolate, melted and at room temp.

For the Pomegranate Poured Fondant:
- 1 cup of plain shortening (I used vegetable)
- 6-8 cups of powdered sugar (I ended up using 8 cups total)
- 1 cup of pomegranate juice.

Directions: {Copied from original recipe - why change something that isn't broken?!}

  1. For the cake: Preheat the oven to 350 degrees F. Line the bottom of a 9X13 pan with parchment paper and thoroughly grease the sides. Sift (or whisk) all dry ingredients in a bowl.
  2. Beat together the eggs, buttermilk, oil, and vanilla. Slowly mix in the dry ingredients, and whisk for two minutes. Once well combined pour in the hot water and mix well. Pour into the cake pan and tap the pan on the counter a few times to remove any large bubbles.
  3. Bake for 20 minutes, or until toothpick inserted comes out clean.
  4. Allow the cakes to cool for 15 minutes, then flip out on a plastic board. Remove the parchment paper. If the cake looks even, place in the freezer. If the top is rounded, Carefully flip the cake over (using another cookie sheet) and trim the top with a serrated knife, then freeze.
  5. For the Whipped Pomegranate Cream: Add the Pom Juice and flour to a small sauce pan. Whisk until there are no lumps. Then heat over medium, whisking constantly until the mixture comes to a boil. Whisk and cook a few more minutes until it thickens into a paste. Remove from heat and place pan in the fridge to cool. Beat the butter and sugar in a clean mixing bowl, for 5-7 minutes, until fluffy and glossy.
  6. Once cooled, add the flour mixture to the butter mixture and beat until light and fluffy 5 minutes.
  7. Spread the pomegranate cream evenly over the cake and return to the freezer.
  8. For the Whipped Chocolate Cream: Add the milk, flour, and cocoa powder to a small sauce pan. Whisk until there are no lumps. Then heat over medium, whisking constantly until the mixture comes to a boil. Whisk and cook a few more minutes until it thickens into a paste. Remove from heat and place pan in the fridge to cool. Beat the butter and sugar in a clean mixing bowl, for 5-7 minutes, until fluffy and glossy. Once cooled, add the flour mixture to the butter mixture. Pour in the vanilla and the cooled melted chocolate and beat until light and fluffy 5 minutes.
  9. Spread evenly over the top of the pomegranate cream. Return to the freezer.
  10. Once frozen, trim the edges of the cake until very smooth. The cake will be about 8X12 inches after trimming. Then carefully cut the cake into 1 inch squares, 96 total. You may want to use a clean ruler to mark the top of the chocolate cream to make the pieces even. Return the cake squares to the freezer.
  11. For the Pomegranate Poured Fondant: Place the shortening and half the pomegranate juice in a large bowl. Microwave until the shortening has melted. Add 5 cups of powdered sugar to the mix and whisk until smooth. Add a little more juice and another cup of powdered sugar, whisk. The fondant should be smooth and glossy, thin enough to pour but thick enough to coat well, a little thicker than school glue. If you see shortening dots on the top, add more powdered sugar. It may take all the juice and as much as 8 cups of powdered sugar to even out–but not always. Rewarm and whisk before dipping the petit fours. The fondant needs to stay warm.
  12. Before dipping, dust the bottoms of each petit four, so that crumbs don’t fall in the poured fondant.
  13. Place a petit four on a fork over the fondant bowl. Using a large spoon, scoop fondant over the top covering completely on all sides, then use another fork to carefully transfer to a drying rack. Repeat with all, rewarm the fondant if needed.


Sunday, February 12, 2012

Browned butter brownie

I've gotten many questions in regards to when you can just do a straight up substitute from regular unbleached flour to GF all purpose flour. I don't have a solid answer to that question but I like to think if it's less than 1/2 cup that it probably won't make that huge of a difference. So when I saw this recipe exactly one year ago in the February 2011 of Bon Appetit I knew I had to make it!

I've made this many times before and I have to stress that it is very important that you let the brownies cool in the pan for about 2.5 hours before cutting into the brownies. The best part about these brownies is that you only need ONE pot and a whisk! This is what I call a one pot dessert, you only need one pot and one whisk and you're set to make the best brownies EVER!!!


Ingredients:
Nonstick vegetable oil spray

- 10 tablespoons (1 1/4 sticks) unsalted butter, cut into 1-inch pieces

- 1 1/4 cups sugar

- 3/4 cup natural unsweetened cocoa powder (spooned into cup to measure, then leveled)

- 1 teaspoon vanilla extract

- 2 large eggs, chilled

- 1/3 cup plus 1 tablespoon of GF all purpose flour

- 1 cup walnut pieces

- 2 teaspoon of water
- 1/4 teaspoon of salt

Directions:
Preheat oven to 325 degrees.
1. Please rack on bottom third of oven.
2. Line 8x8x2 inch baking pan with foil (I used glass, and it worked out fine)
3. Coat foil with nonstick spray.
4. Melt butter in medium saucepan on medium heat. Continue cooking until cutter stops foaming and there are brown bits at the bottom of the pan. Stir often and make sure not to burn the butter. It'll take about 5 minutes. 
5. Remove from heat and stir in cocoa, water, sugar, vanilla, and salt. 
6. Set aside to cool for 5 more minutes. 
7. Add eggs 1 at a time, beat to blend after each egg. When mixture becomes thick and shiny, add flour and mix well. Beat in 60 strokes then add chopped walnuts. 
8. Transfer to prepared pan.
9. Bake for 25 minutes.
10. Let cook in pan on cooking rack for 2 hours before cutting. 


Tuesday, February 7, 2012

Cake pops, cake pops, and more cake pops!

Did you need some inspiration for some valentines day treats?!?!? Well you're in luck because yesterday I whipped out some cake pops to send to some lucky friends and family!

All I can say is ONCE A CHEATER ALWAYS A CHEATER. Not words you expect to hear as we are quickly approaching Valentines day but for me this sentence rings true as I used Betty Crocker's gluten free cake mixes to save on time.


I've been dying to test out my new cake pop maker that arrived two weeks ago and figured Valentines day was the perfect reason to use it! Although the cake mixes are good as is, I ended up adding an ingredient to each. I added 1 tablespoon of lemon zest and the juice of one lemon to the the yellow cake mix and 1/3 cup of greek yogurt to the devils food mix. 

Each batter yields about 50 cake pops a piece, so you'll have leftovers unless you plan to decorate 100 cake pops. After an hour of baking I set all the cake balls to completely cool before decorating. 


I had fully intended to use white, pink, and red candy melts to coat the cake pops but they didn't arrive in the mail in time :( Luckily we had a huge Lindt chocolate bar that I chopped up and melted over a double broiler. 

* If you do not have a double broiler you can get the same effect by simmering some water in a small pot and placing the chocolate in a heat safe bowl on top of the pot of water. 

Once the chocolate has melted, take a lollipop stick and dip it into the chocolate so 1/4 of an inch of the stick is covered with chocolate (this will help the cake pops stay on the stick) and then dip the ball into melted chocolate until it is fully covered. Make sure to tap off excess chocolate as you don't want it to drip down when cooling. Then sprinkle and/or decorate. Place decorated cake pops in cooling stand to set and place in refrigerator so the chocolate hardens a bit. 


After the chocolate and decorations have set, I topped the cake pops with some mini cupcake holders so it was easier to package. 

* I got most of my supplies from Amazon.com and it was actually pretty inexpensive overall. Placing them on mini cupcake holders makes it easier to transport as well :)


Packaged and all ready to be mailed!

IMPORTANT NOTE: Please don't be discouraged if you don't have a cake pop maker, please check out Bakerella's video as she will give you a step by step on how to make the cake balls. Super easy and you'll be glad you took the time to watch the video as it has some very helpful tips!!

Also I hope not to always be a "cheater" and use boxed cake mix as I plan to share some of my baking recipes with you that were made from scratch, stay tuned!


Wednesday, February 1, 2012

Divine Chocolate Souffles

Last night I recreated my "fan favorite"dinner with two new sides (check back later for the recipes) and my DIVINE CHOCOLATE SOUFFLES! My taste tester has described the souffles as "heavenly" and she would know as I made her eat several (7 to be exact) variations of chocolate souffles before I settled on this recipe.


I've tested it out with more sugar, less sugar, three egg yolks, two egg yolks, one egg yolk, no egg yolk, lemon, no lemon, salt, no salt, you name it. I've altered this recipe many times but the answer was very clear.... NO egg yolk, more sugar,  and yes to the pinch of salt.


Divine Chocolate Souffles (4-6 servings)
- 3/4 cup of bittersweet chocolate, chopped (semi-sweet is okay too)
- 3 egg whites
- 4 tablespoons of butter at room temperature, additional for ramekin
- 1/2 cup of sugar, additional for ramekin molds
- pinch of salt
- pinch of cream of tartar


Directions:
Preheat oven at 375 degrees.
1. Prepare ramekins. Slightly coat the inside of the ramekin with butter and sprinkle with sugar.
2. Place chocolate and butter in a heat-safe bowl and place over a small pot of simmering water. Stir until everything is melted and smooth. Add the pinch of salt, remove from heat and set aside to cool.
3. Beat the 3 egg whites along with a pinch of cream of tartar until they become frothy. Add in sugar and beat till mixture has reached stiff peaks.
4. Gently fold chocolate into egg white mixture.
5. Spoon souffle mixture into ramekins. Place ramekins on a baking sheet and add water so it lightly covers the baking sheet.
6. Bake for 22-24 minutes. Serve immediately with whipped cream and berries!


Saturday, January 28, 2012

The Ultimate Birthday Cupcake!

I have a little secret that I have to confess.... I'm a closet baker. Yup that's right I LOVE to bake. These days though I need a reason to bake or to test out all the recipes that I have compiled. So for my good friends birthday I knew I had to pull out all the stops for her birthday cupcakes because she DOES NOT like dessert. 


With a little help from my friend Jennifer @ The Brilliant Crafty Type, I was all set with tips and secrets to making a decadent chocolate cupcake filled with ganache and topped with fluffy peanut butter frosting and sprinkled with chocolate shavings and fleur de sel! 


Let me begin by telling everyone that I did cheat a little bit ..... I ended up using Gluten-Free Pantry Cake Mix Decadent Chocolate. This particular cake mix is wonderful and I have used it many many times and if I don't tell my friends that I used a cake mix they 1) couldn't tell it was gluten free 2) thought it was homemade. 

Here's a little secret to making boxed mix taste like homemade baked goods:
1) Add 1/2 cup of sour cream to the mix. 
2) Place a ramekin of water in the oven when baking the cupcakes or cake, this will help keep the baked goods moist. 


The cupcakes can be made ahead of time as they will need some time to cool before you can pipe ganache into them. Please note that you can use a pastry bag or a plastic bag. I use a gallon sized zip lock bag and make a small cut in one of the corners, big enough for my stainless steel piping tip to fit snugly in the corner. Then I pour the cooled ganache into my piping bag careful not to let it drip everywhere. Pipe about 1/2 tablespoon into the cupcake, you'll know as it'll ooze over if you have piped too much. Not to worry though as the peanut butter frosting will over up the mess.

I also use the same idea to frost the cupcakes except I use a star piping tip instead of a fine tip. I start by going from the outside working my way to the center going in a circular motion. The chocolate shavings and fleur de sel (fancy word for flavored infused salt) were a added bonus cause I had some in the pantry. By all means they are not necessary, but fun to play with. 

Peanut Butter Frosting
  • 1/2 cup butter, room temperature 
  • 1 cup creamy peanut butter
  • 4 cups confectioners' sugar
  • 1/3 cup cream (any kind of milk is okay)

Directions: 
1. Mix butter and peanut butter until it is light and fluffy. 
2. Slowly (so don't make a powdered sugar explosion) mix in 1/2 a cup of confectioner's sugar. 
3. Add 1/3 cup of milk
4. Beat in the remaining confectioner's sugar 1/2 cup at a time. 

*** If the frosting is not at the consistency that you would like it to be at, add more cream or milk until it gets to a good piping consistency. 

Ganache Recipe:
  • 9 ounces bittersweet chocolate, chopped
  • 1 cup heavy cream

Directions: 
1. Place chocolate into a bowl.
2. Heat cream in a small sauce pan on medium heat. Bring to a boil, then remove from heat and pour over the chocolate. 
3. Whisk until smooth.
4. Allow ganache to cool before putting it into the piping bag.  


Friday, January 27, 2012

Fudgy Meringue Cookies


I can't even take credit for this wonderful recipe, as I found it in the March 2011 Bon Appetit magazine! 

Baking gluten free goods can be a bit intimidating because they tend to include many different flours and things I have never heard of. Not this recipe though! I find myself baking these cookies when I know people will be coming over through out the day because I want as many people as possible to enjoy them, they are THAT good!


Fudgy Meringue Cookies – 2 hours

-       nonstick vegetable oil spray or silpat
-       1 cup bittersweet chocolate chips divided
-       1.5 cups powdered sugar, divided
-       1/3 cup unsweetened cocoa powder
-       2 teaspoon cornstarch
-       2 large egg whites, room temp
-       ½ teaspoon vanilla extract
-       1/8 teaspoon cream of tartar

Direction:
1. Position 1 rack in top third and 1 rack in bottom third of oven and preheat to 350°F. 
2. Coat 2 large rimmed baking sheets with nonstick spray. Not necessary if you're using a silpat.
3. Place 1/2 cup chocolate chips in small microwave-safe bowl. Cook in 15-second intervals until chocolate softens; stir until melted and smooth. Cool chocolate to lukewarm, about 10 minutes. 
4. Whisk 1/2 cup sugar, cocoa, and cornstarch in small bowl to blend.
5. Using electric mixer, beat room-temperature egg whites, vanilla, 1/8 teaspoon salt, and cream of tartar in medium bowl until soft peaks form. Add remaining 1 cup sugar in 4 additions, beating just to blend after each addition. Continue to beat until meringue is thick and glossy like marshmallow creme, about 2 minutes longer. Beat in cocoa mixture. Fold in melted chocolate, then 1/2 cup chips.
6. Drop batter by rounded tablespoonfuls onto prepared sheets, spacing 3 inches apart. 
7. Bake cookies 7 minutes. Reverse sheets and bake until dry-looking and cracked, about 6 minutes. Cool cookies on sheets 5 minutes. Transfer cookies to rack until completely cooled. 


Le Bete Noire

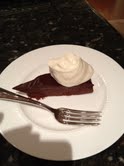
Le bete noire sounds fancy but it's incredibly simple! Its translation is "the black beast" stemming from all the chocolate that is used to make this decedent dessert. 

This should be made for dinner parties or to take to a potluck as there is no way for two people to finish this alone, not even if they ate it everyday for a week!


Le Bete Noire

Cake:
-       1 cup water
-       ¾ cup sugar
-       9 tablesppon unsalted butter, diced
-       18 ounces of bittersweet or semisweet chocolate, chopped
-       6 large eggs

Ganache:
-       1 cup heavy whipping cream
-       8 ounces bittersweet or semisweet chocolate, chopped

-       light sweetened whipped cream

Direction:
For cake:
1.    Preheat oven to 350°F. Butter 10-inch-diameter springform pan.
2.    Line bottom of pan with parchment round; butter parchment. Wrap 3 layers of heavy-duty foil around outside of pan, bringing foil to top of rim.
3.    Combine 1 cup water and sugar in small saucepan. Bring to boil over medium heat, stirring until sugar dissolves. Simmer 5 minutes. Remove from heat.
4.    Melt butter in large saucepan over low heat. Add chocolate and whisk until smooth. Whisk sugar syrup into chocolate; cool slightly. Add eggs to chocolate mixture and whisk until well blended.
5.    Pour batter into prepared pan.
6.    Place cake pan in large roasting pan. Add enough hot water to roasting pan to come halfway up sides of cake pan.
7.    Bake cake until center no longer moves when pan is gently shaken, about 50 minutes. Remove from water bath; transfer to rack. Cool completely in pan.

For ganache:
1.    Bring whipping cream to simmer in small saucepan over medium heat. Remove from heat. Add chocolate and whisk until smooth.
2.    Pour over top of cake still in pan. Gently shake pan to distribute ganache evenly over top of cake.
3.    Refrigerate cake in pan until ganache is set, about 2 hours.
DO AHEAD: Can be made 2 days ahead. Cover and keep refrigerated.
Run knife around pan sides to loosen cake; release sides. Cut cake into wedges and serve with whipped cream.